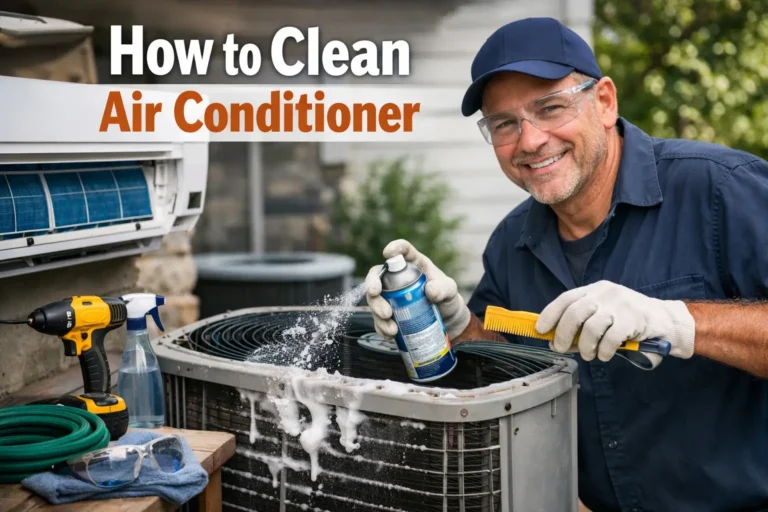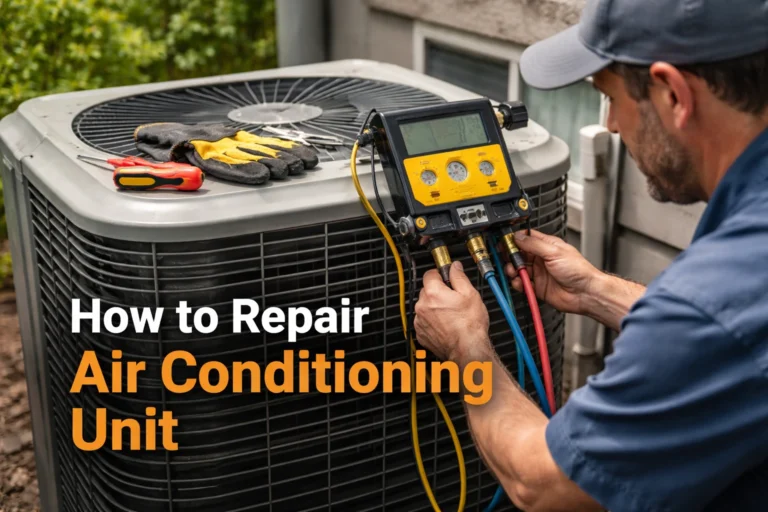
How to Repair Heating and Air Conditioning
Imagine coming home on a scorching summer afternoon and finding your air conditioner blowing only warm air. Or waking up on a freezing winter night to a furnace that won’t turn on. You feel stuck and uncomfortable, and the repair bills might be on your mind. Don’t panic – many HVAC (heating, ventilation, and air conditioning) problems have simple fixes. In this guide, a local HVAC technician will walk you through how to diagnose and repair heating and air conditioning issues step by step. We’ll cover clear answers first, then show detailed steps, examples, and even insider tips. By the end, you’ll know how to tackle common heater and AC problems safely or when to call in a pro.
Why Act Fast: Ignoring strange noises, weak airflow, or an unexpected shutdown can lead to bigger failures and higher costs. For example, a dirty filter makes the system work harder and can cause overheating. That quick squeal you hear today might turn into a broken compressor tomorrow. We’ll help you fix small issues before they become emergencies. You’ll feel empowered and save money – and if the problem is beyond DIY, you’ll know exactly when to get help. Let’s dive in.
How do I know if my HVAC system needs repair?
If your heater or air conditioner is acting up, don’t wait. The warning signs are often obvious: unusual noises, weak or no airflow, uneven temperatures, or sudden spikes in your energy bill. These symptoms mean something isn’t right with airflow or temperature control. For instance, if the AC blows warm air on a hot day, or the furnace runs but the house stays cold, it usually signals a mechanical or refrigerant issue. Strange sounds like grinding or squealing often indicate loose or worn parts. Even a persistent smell of mold or gas is a red flag – mold might mean a clogged drain or duct issue, and a gas smell means shut off the system and call a professional immediately.
Step 1: Check basic settings. First, make sure your thermostat is set correctly: cooling mode in summer, heating mode in winter. A simple mistake like a thermostat still on “heat” can make your AC warm up the room instead of cooling. Also ensure the thermostat temperature is set lower (in summer) or higher (in winter) than room temperature. Check that circuit breakers for the HVAC are on. Faulty breakers or tripped fuses often stop systems with no clear warning.
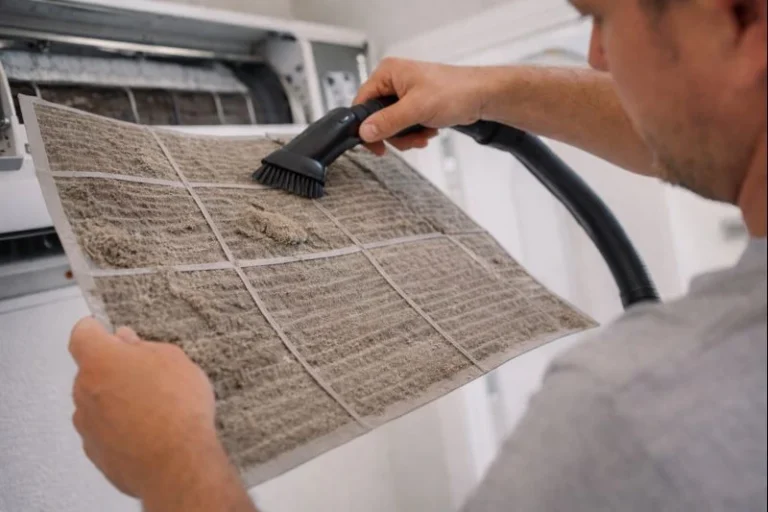
Step 2: Inspect filters and vents. A clogged air filter can restrict airflow so badly the unit runs constantly but the air barely moves. Remove the filter and see if it’s full of dust. If so, replace or clean it (see next sections). Also walk through your home and make sure all vent registers are open and not blocked by furniture. Closed or dirty vents can starve the system of air and cause overheating.
Step 3: Listen and look. Turn your HVAC system on and stand near it (outside for the condenser, inside near the furnace or air handler). Listen for rattles, squeals, or hums. If you hear grinding or very loud thumps, something is loose or failing. Also check the outdoor unit: is the fan spinning? Is the coil dirty or covered with leaves? Inspect for visible refrigerant leaks (a hissing sound or oily spots) – a refrigerant leak is serious and needs pro handling. Inside, peek at the furnace or blower: see any water pooling or dirt? Any smell of burning plastic or gas? Note every symptom.
Step 4: Check energy usage. If your electric or fuel bill suddenly jumped for no change in usage, it could mean your HVAC is straining. A dirty filter, failing motor, or low refrigerant can all make the system run longer and hike bills. Keep an eye on monthly bills and mark big jumps.
Real Example: I once had a customer whose AC was short-cycling (turning on and off quickly). It turned out the air filter was packed with pet hair. Replacing it stopped the chatter and cooled properly again. In another case, a homeowner noticed no heat. We found the thermostat batteries were dead – a quick swap got the furnace roaring again. These examples show that small fixes often solve big worries.
Key Tip: Don’t wait for a total breakdown. Catch issues early. For example, strange noises now probably mean bearings or belts need attention. Addressing a squeak or vibration today can prevent a motor burn-out later.
What should I check first before trying to repair HVAC equipment?
Before you crack open any covers, safety comes first. HVAC systems have powerful motors, high voltage, and even gas in furnaces. Always turn off power and gas before inspecting. Follow these safe troubleshooting steps:
- Turn off power. Kill the circuit at the breaker box. Verify the system is off by switching the thermostat off or just lowering the fan mode to “off.” This prevents accidents while you look inside.
- Check thermostat settings. Sometimes the fix is simple – ensure it’s on the right mode and temperature. Many thermostats display error codes or a blank screen if batteries are dead. If it’s blank, change the batteries. If that doesn’t power it, reset the breaker or call an electrician.
- Inspect filters. As mentioned, check the air filter’s condition. A very clogged filter is easy to spot and replace.
- Look at vents and registers. Remove furniture or rugs blocking any vents. Make sure fresh air intakes (if you have them) are clear.
- Reset the system. Sometimes a full power cycle helps. Turn off the unit at both the thermostat and breaker for a few minutes, then turn it back on. This can reset internal safety switches.
Common Mistake: Never insert fingers or tools into the blower or condenser while it’s powered on. Many systems have safety switches that shut down if a panel is removed – use that. Also, do not attempt to handle refrigerant or open sealed system components (coils, compressor). These require special certification and tools.
Pro Tip: Keep a multimeter handy. You can use it to verify that there is actually power to the unit. For example, if the blower won’t start, check that power is present at the motor terminals. A multimeter can also test the thermostat wires. Just be careful and know what you’re doing.
How can I fix an air conditioner that blows warm air?
Straight answer: An AC blowing warm air usually means the cooling cycle is interrupted – often by bad thermostat settings, a dirty filter, low refrigerant, or a dirty outdoor unit. You can try simple fixes first and see if they restore cool air.
Step 1: Thermostat and settings. Double-check the thermostat is truly set to “Cool” mode and not accidentally left in “Heat”. We’ve had calls where the homeowner’s kid bumped the thermostat. Correct the mode and temperature setting. If it was in “Heat” and the system was trying to heat during a hot day, it would definitely blow warm.
Step 2: Replace the air filter. A dirty filter can starve the system of airflow. In cooling mode, lack of airflow can also freeze up the evaporator coils, which leads to warm air blowing or no air at all. Remove the filter and replace it with a clean one. According to Energy.gov, replacing a dirty filter with a clean one helps the AC operate efficiently and protects it from dirt buildup. After replacing, wait 15 minutes and listen: has cold air returned?
Step 3: Clear the outside unit. Go outside to the condenser. Turn off power at the disconnect or breaker first. Inspect for leaves, dirt, or debris on the condenser coils. Clean them: remove leaves, and wash gently with a garden hose (don’t use a pressure washer). Dirty outdoor coils can’t expel heat, so the refrigerant won’t cool properly. Trim nearby shrubs at least 2 feet from the unit.
Step 4: Check condensate drain. A clogged drain can sometimes trip a safety switch or cause the evaporator to freeze, resulting in warm air. Locate the drain line (often PVC pipe) and pour a cup of distilled white vinegar in it, then flush with water. This removes algae or blockages.
Step 5: Listen for the compressor and fans. When the AC runs, the outside fan should spin and the compressor should hum. If the fan isn’t spinning at all, the unit will blow only ambient air. Tighten any loose fan belts and ensure nothing blocks the blades. If the fan or compressor is dead, that’s a call for a professional – you may have a bad capacitor or motor.
Step 6: Consider refrigerant. If none of the above works and the system still blows warm, the refrigerant might be low due to a leak. Refrigerant leaks are common and serious. Do not try to recharge Freon yourself (it’s illegal and dangerous). Call an HVAC pro to test for leaks, fix them, and recharge to the correct level. Low refrigerant not only makes the AC warm but can damage the compressor.
Example: A customer once reported warm air from her AC. We checked everything and found her condenser fan wasn’t running because the old capacitor had failed. Swapping the capacitor made the fan spin again, and cold air was restored immediately. This kind of fix took about 30 minutes and saved the day.
Common Mistake: Don’t ignore the obvious. In one case, a homeowner found out the “warm air” was simply because the thermostat schedule was set to 80°F on “away” mode. Always verify those simple settings before assuming a big repair.
How do I fix weak airflow or no airflow from vents?
Straight answer: Weak or no airflow usually means air can’t travel through the system properly. Common culprits are a clogged filter, closed vents, a failed blower motor, or duct issues. Start by fixing the simplest problems.
Step 1: Replace the air filter. Again, a dirty filter is the number one cause of poor airflow. Remove the filter and put in a new one the correct size. Many filters need replacement every 1-3 months. Once replaced, turn the system on and feel the air. If it’s now strong, you’ve likely solved it.
Step 2: Check all vents and registers. Make sure every supply vent in the home is fully open and nothing (curtains, furniture, toys) is blocking it. Sometimes, return vents are accidentally covered, which chokes the system. Also, check under the furnace/air handler – some systems have a filter or panel there you must close completely.
Step 3: Inspect the blower assembly. Turn off power, open the furnace/air handler panel, and look at the blower fan (a squirrel-cage blower). If it’s clogged with dust or if the motor is seized, airflow will be poor. Carefully clean out dust with a vacuum. Check that the belt (if present) is tight and not slipping. If the blower motor is humming but not spinning, the motor or capacitor may have failed – that’s a professional repair.
Step 4: Examine the ductwork. In some homes, ducts become disconnected or collapsed behind walls/ceilings. With the system running, walk through the house and feel for any air coming out of return vents. You can also put a piece of tissue near ducts and see if it flutters. Leaky ducts in the attic or walls reduce airflow dramatically. Sealing large gaps (with HVAC foil tape) can help, but hidden leaks may need an expert leak test.
Example: A homeowner complained her bedroom was barely warm even though the rest of the house was fine. We found her bedroom duct had fallen off in the attic. We reattached it, and hot air flowed right in.
Pro Tip: Check the blower speed setting (if accessible) on some older furnaces. They have different taps for high/low speed. Make sure it’s set correctly. Also, if this problem only happens on heat or AC separately, it could be a stuck reversing valve (in heat pumps) or a specific issue with blower speed.
What if my heating system won’t turn on or produce heat?
Straight answer: Start with the basics: ensure power and fuel (electricity or gas) are on. Check thermostat mode and batteries, then move on to filters and pilot lights. If those are fine, the issue may be more complex, like a bad ignition or safety switch.
Step 1: Thermostat and power. Verify the thermostat is set to “Heat” and that the set temperature is above room temperature. Replace its batteries if the display is dim. Next, check the furnace’s circuit breaker or fuse. Furnaces have their own switch and fuse – it might be off. Reset any tripped breakers.
Step 2: Air filter and vents. As always, swap in a clean filter. Restricting airflow can cause a furnace to overheat and shut off before heating (short cycling). Make sure all warm-air vents are open.
Step 3: Gas supply or fuel. If you have a gas furnace, make sure the gas valve to the unit is open. Check other gas appliances (stove) to confirm gas is on in the house. If the furnace panel has a switch, turn it off and on again.
Step 4: Pilot light or ignition. For older furnaces with a pilot light, ensure the pilot flame is lit and steady blue. If it’s out, follow the furnace manual to relight it. If the flame sensor is dirty, it may shut off the gas. Gently clean the sensor rod with fine sandpaper to restore it. Warning: Don’t attempt this without being sure of what you’re doing, and always turn off gas first. For newer furnaces with electronic ignition, listen for the spark or glow. If you hear clicks but no ignition, the igniter might be bad. Replacing igniters or gas valves is usually best left to pros due to gas safety.
Step 5: Condensate or safety switch. Many high-efficiency furnaces have condensate drains and float switches. If the condensate line is clogged, the float switch can cut power to the furnace. Check for a drain pan under the furnace – if it’s full, clear the line.
Example: A neighbor’s furnace wouldn’t heat because a new energy-saving thermostat had locked out “heat” mode by schedule. Switching to manual control fixed it. Another case: a furnace kicked on for a few seconds then shut off. We found the flame sensor was covered in carbon; after cleaning it, the furnace stayed lit.
When to Call a Professional: If you smell natural gas or if the furnace still won’t ignite after these steps, stop and call an HVAC technician immediately. A cracked heat exchanger or gas leak is dangerous.
How can I fix ignition or pilot light problems?
Straight answer: If a pilot light or ignitor won’t work, try cleaning or resetting first. If that fails, it’s time to call a technician. Ignition systems involve gas and high voltage, so be cautious.
Step 1: Pilot light (older furnaces). Turn off the furnace (breaker and thermostat) and wait for it to cool. Open the furnace panel. If the pilot light is out, inspect the pilot assembly: it should be clean and correctly positioned. Use the reset button (if present) or follow the relight instructions. If it goes out again, do not repeatedly try – that could flood the area with gas. Ventilate the room and call a pro.
Step 2: Electronic igniter (newer furnaces). Many modern furnaces have a hot surface igniter or spark igniter. These can fail after years of use. Usually, the symptom is that you hear the furnace try to start (you’ll hear a humming or clicking), but no flame. If you have the skills, you can check continuity of the igniter with a multimeter (expect near 0 ohms). A burned-out igniter needs replacement. You can often buy a replacement igniter online with your furnace’s model number. Replacing it usually involves unplugging the old one and plugging in the new.
Step 3: Check for dirty flame sensor. Even if the pilot or igniter works, a dirty flame sensor rod can make the furnace think the flame didn’t light, cutting the cycle. Gently scrape it clean with fine sandpaper.
Step 4: Confirm gas supply and pressure. If everything seems in order but still no flame, the issue could be the gas valve or pressure. This definitely requires a pro. They will use a gas pressure gauge (manometer) to check the pressure is within spec, and test the gas valve.
Example: A customer’s furnace would come on, flame would flash for a second, then go out. We cleaned the flame sensor, and it worked flawlessly. But another’s furnace had a cracked igniter. Even though you hear clicking, that little ceramic piece was broken. We replaced the igniter cartridge and it ran smoothly.
Common Mistake: Don’t try to hide a gas smell. A leak near the pilot or gas line is deadly. Stop immediately and call emergency services or the gas company if you smell gas.
What are common DIY HVAC repairs I can safely do?
Straight answer: Homeowners can tackle a handful of simple tasks: filter changes, thermostat checks, cleaning around the unit, and resetting breakers. These maintain performance and often solve basic issues. Beyond that, call a pro.
DIY Step-by-step:
- Replace Air Filters (easy): As discussed, swap out filters every 1-3 months. Filters are cheap and save you big on electricity and repairs.
- Clean Outdoor Unit (moderate): Turn off power. Remove leaves or debris around the condenser. Wash dirt off the fins with a hose. Make sure drains aren’t blocked.
- Vacuum Vents (easy): Use a brush attachment to vacuum visible dust from vents and returns. This improves air quality and airflow.
- Check Thermostat (easy): Change its batteries yearly. Recalibrate if it’s consistently off (set room thermometer next to it for 20 minutes and adjust).
- Inspect Drain Lines (moderate): Use vinegar to flush the AC condensate drain line every few months.
- Tighten Screws (easy): At the blower and on any external panel, gently ensure all screws are snug. Vibration can loosen them. Turn off power first.
- Lubricate (moderate): Some older HVAC motors have oil ports. Apply a few drops of electric motor oil if manufacturer recommends. Not all units require it.
Tools & Materials: You’ll need a new filter of the right size (check your furnace’s panel for the number), a screwdriver set, pliers, a wet/dry vacuum, and maybe a soft brush for coils. A multimeter can help with electrical troubleshooting, but only use it if you know how.
Pro Tips:
- Keep an open fire extinguisher nearby if dealing with gas or electrical parts.
- Always use filters made to spec; cheap generic ones may not fit well and let dust in.
- If you disassemble anything, take photos so you remember how to reassemble.
When to Stop DIY: If you can’t pin down the problem, or if your fixes don’t work, don’t keep fiddling for hours. Calling a trained technician early can save you money (fixing a small issue now is cheaper than a full system breakdown later).
What tools and materials do I need for basic HVAC repairs?
Essential tools: For DIY fixes, gather these basics:
- Screwdrivers (flat-head and Phillips) for panels and components.
- Nut drivers or wrenches for tightening line-set fittings on the AC (if you ever service lines).
- Pliers and channel locks for various tasks.
- Multimeter (volt/ohm meter): To check that power is reaching the unit or thermostat. For example, you can confirm if the AC capacitor is charged or if the thermostat is sending 24VAC to the system.
- Flashlight or headlamp to see inside dark furnace compartments.
- Replacement filters of the correct size (usually written on the old filter). Having spares on hand is handy.
- Vinegar and a funnel for clearing condensate drains. A stiff pipe brush can help clean drain lines.
- Garden hose for washing outdoor coil fins.
Specialized tools (for pros): These include gauge manifolds for refrigerant, vacuum pumps, combustion analyzers, flue gas analyzers, and specialized capmatic driver sets. As a homeowner, you won’t need these. In fact, handling refrigerant gauges requires EPA certification.
Safety gear: Use work gloves and safety glasses, especially when cleaning coils or drilling. A dust mask when cleaning an old filter or duct can be helpful.
Insider tip: Invest in a smart thermostat. It pays back by improving efficiency and can alert you early if the system isn’t reaching set temperatures. Many smart thermostats also tell you when the filter needs changing.
When should I call a professional HVAC technician?
Straight answer: Call a professional whenever the fix involves electrical, gas, or refrigerant, or if the problem persists after basic checks. HVAC techs have the training and licensing for these parts.
Red flags needing a pro:
- Gas Smell or Carbon Monoxide Alarm: Any gas furnace burning irregularly or producing odors is dangerous.
- Refrigerant Issues: If your AC is low on refrigerant (warm air after filter/coil cleaning) you’ll need a certified technician to find and seal the leak, then recharge the system.
- Electrical Failures: If breakers trip repeatedly, or the blower won’t start after checking power, you likely have a bad capacitor, motor, or control board. These parts are best handled by pros.
- Strange Noises: Grinding metal, loud bangs, or screeching usually mean a failing motor or detached part. A technician can disassemble and fix it.
- Complex Repairs: Stuff like replacing a compressor, heat exchanger, or control board. These require disassembly and specialized knowledge.
- Repeated Breakdowns: If you’re fixing the same issue every few months (like short cycling that won’t stay fixed), it could indicate a bigger underlying problem. Pros can spot issues you might miss.
Common sense: If at any point you feel uncertain, or the fix isn’t working, call. It’s safer and can save money. According to the Department of Energy, if your AC needs more than routine maintenance, hire a professional technician who can diagnose and fix issues like refrigerant leaks or electrical faults. Professionals also handle refrigerant legally and test systems thoroughly.
Example: We had a case where a homeowner tried to “top up” refrigerant with an over-the-counter kit. It made no difference (the leak was big) and they risked overcharging the system. A pro later fixed the leak properly.
Pro Tip: Many HVAC companies offer annual maintenance plans. This proactive approach prevents big problems. Think of it like a tune-up for your car. Energy Star also recommends yearly inspections—spring for the AC and fall for the furnace.
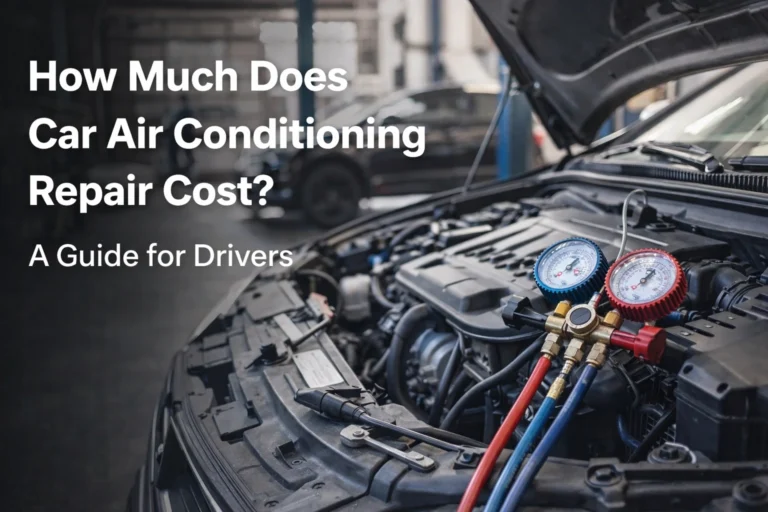
How much will HVAC repairs likely cost, and how long do they take?
Straight answer: Costs and time vary widely. Minor fixes (like a filter change or blown fuse) cost very little and take under an hour. Major repairs (compressor replacement, heat exchanger crack) can run $500–$2,000 and take a few hours up to a full day.
Cost factors: According to industry data, the average HVAC repair costs about $350, but it can range from $100 to $3,000 based on the job. A single repair call (diagnostic fee) might be $100–$250. Then parts and labor are added. For example, replacing a burned-out capacitor might only be $150 total, whereas a new compressor or motor could be over $1,000 (parts alone).
Here are some ballpark figures:
- Air filter or thermostat replacement: $50–$150 total, often DIY.
- Circuit breaker or fuse replacement: $100–$300 (includes electrician or HVAC labor).
- Contactor or small relay: $100–$200.
- Capacitor or fan motor: $200–$600.
- Compressor or blower motor: $500–$2,000+ (major parts).
Labor is a big part. Technicians usually charge either a flat rate for the repair (part + labor combined) or an hourly rate ($100–$250/hr) plus the part.
Time estimates: Many repairs can be done within a few hours. For instance, changing a capacitor or cleaning coils typically takes 30 minutes to 1 hour. Replacing a thermostat or filter is just minutes. More extensive jobs like a full compressor swap or heat exchanger replacement might take a full day or longer, especially if parts must be ordered. Minor issues like clogged filters or thermostat fixes can be done within a few hours. A refrigerant leak fix could take longer, depending on severity and drying time.
Example: Last summer I replaced a faulty AC fan capacitor and motor in about 2 hours, and it cost the homeowner around $300. In another case, swapping out a heating coil in a furnace took nearly a full day of work, costing over $1,000. The key is catching problems early – fixing a small fan now avoids a rushed, more expensive repair in peak season.
Pro Tip: Ask for a clear estimate and breakdown: labor vs parts. And get at least two quotes for big jobs. Remember, routine maintenance often costs under $200 and prevents these large repairs by keeping the system healthy.
How can I prevent future HVAC breakdowns with maintenance?
Straight answer: Regular maintenance is the best way to prevent repairs. Schedule annual check-ups and do a few checks yourself each season. This keeps your system efficient, safe, and long-lasting.
Routine maintenance tasks:
- Spring (Cooling season start): Before summer hits, have a technician clean and test the AC. They’ll flush condensate lines, check refrigerant, tighten electrical connections, and clean coils. Also, vacuum or replace filters monthly. Remove the AC cover (if you have one) so the unit can breathe.
- Fall (Heating season start): Before it gets cold, tune up the furnace. This includes checking gas pressure, inspecting heat exchanger, lubricating fan bearings, and testing safety controls. Replace filters again. Ensure vents are open and clear.
- Monthly: Change or clean filters every 30–90 days (monthly if you have pets or allergies). A clogged filter can increase energy use and cause breakdowns.
- Keep area clear: Trim plants and debris 2 feet around the outdoor unit year-round. Never let leaves pile up on it. Indoors, keep the furnace area free of clutter.
- Watch and listen: Pay attention year-round. If the system is unusually loud or performance dips, address it immediately rather than wait for an annual check.
Why it matters: ENERGY STAR emphasizes that annual pre-season check-ups by a contractor catch small issues early. A little upkeep prevents the emergency hustle later. For example, cleaning coils improves cooling and avoids compressor burnout. Tightening electrical terminals prevents shorts. These tasks might seem minor, but they save you from a breakdown when you need heating or cooling the most.
Seasonal tip: In very cold climates, cover the outdoor AC unit in winter (with a breathable cover) to keep ice and debris out. But never cover a heat pump, since covering it stops winter heating.
Local note: Humidity and pollen vary by region. If you live in a dusty or pollen-heavy area, change filters more often. In winter, check for ice build-up. In hurricane or storm season, clear the unit afterwards.
Frequently Asked Questions (FAQ)
Q: How often should I change my HVAC air filter?
A: Check it every month. Most filters need changing every 1-3 months in normal use. If you have pets or allergies, change it monthly. A clean filter saves energy and prevents damage.
Q: Why is my HVAC short cycling (turning on and off quickly)?
A: Short cycling often happens when airflow is blocked (dirty filter) or the thermostat is mis-sized/too sensitive. It could also mean the system is overheating on a minor level and shutting down as a safety. Ensure filters are clean and vents open. If short cycling continues, call a tech – it stresses the compressor.
Q: Why is my heater blowing cold air?
A: If the heater runs but blows cold air, it could be in “fan only” mode (check thermostat), or flame problems. If it’s a gas furnace, the burners might not be lighting (pilot/igniter issue) or the heat exchanger could be cracked (safety shuts it off). It could also be the start delay on a heat pump. Replace filters and verify thermostat first.
Q: Why is my AC freezing up (ice on coils)?
A: Freezing usually means low airflow or low refrigerant. A frozen coil often has a frozen block of ice. Turn the system off and let it thaw. Then replace the filter and see if that fixes it. If it refreezes, you may have a refrigerant leak or blower problem.
Q: How do I reset my thermostat or HVAC system?
A: You can reset by turning off the furnace/AC at the breaker for 1–2 minutes and then turning it back on. For thermostats, some have a reset button or switch inside; replacing batteries and power cycling it often resets error states. Consult your thermostat manual for specifics.
Q: When should I replace my HVAC instead of repair it?
A: Consider replacement when your system is near 15–20 years old or if repair costs approach 50% of a new unit cost. Signs include rising energy bills, frequent breakdowns, and inconsistent comfort. Newer systems are far more efficient, so the long-term savings on energy might justify replacement.
Q: How can I reduce heating and cooling costs?
A: Keep filters clean and vents unblocked to run efficiently. Use a programmable thermostat at sensible temperatures (68°F in winter, 78°F in summer). Seal leaks in doors, windows, and ducts. Ensure your system is properly sized and maintained – an efficient system running right costs less.
Q: My HVAC makes clicking sounds. Is that normal?
A: Some clicks are normal – for example, a click when the thermostat calls for heat or when the AC contactor engages. However, repeated clicking often indicates a relay or contactor issue, and loud metal-on-metal squeaks mean failing bearings. Listen carefully; constant clicking or clunking should be inspected.
Q: Is it safe to use an extension cord for my HVAC unit?
A: No. Never use an extension cord with an HVAC system. They draw a lot of current and need a dedicated circuit. Extensions can overheat. The unit should be wired directly to its own power source by a professional.
Q: Why is my electric bill so high now?
A: If nothing else changed, the HVAC system is likely working harder than usual. Possible causes include dirty filters, leaky ducts, low refrigerant, or thermostat issues. A system running constantly due to these problems will spike energy use. Fixing the root cause will bring your bills back down.
Q: Do I need to cover my outdoor AC unit in winter?
A: If you have a heat pump, no – covering it would stop it from heating your home. If you have a conventional AC (and a separate furnace), you can cover it to keep debris out, but make sure to uncover it before spring. Removing furniture or debris around it can prevent winter damage too.
Q: How long do HVAC systems typically last?
A: Most modern systems last 15–25 years with proper care. Beyond that, efficiency drops and failures become common. If yours is over 15 years and needing repairs often, start thinking about replacement.
Q: Why is my furnace emitting an odor?
A: A faint “new furnace” smell in fall when first turning on the heat is normal (dust burning off coils). But a strong burning smell (like plastic or rubber) or a rotten egg smell (gas leak) is not normal. Shut the system off and call a technician immediately for strong odors.
Conclusion
Knowing how to repair heating and air conditioning systems means catching small issues early and applying safe fixes. We covered key warning signs, step-by-step DIY checks, and when to call a pro. You now know to check filters, thermostat settings, and power first – often these simple steps restore comfort. Remember that regular maintenance and prompt attention to odd symptoms are your best defenses against costly failures.
Next steps: Inspect and maintain. Change your air filter this month, inspect vents, and program your thermostat wisely. Schedule a professional tune-up before peak summer or winter. If ever in doubt or facing gas/electrical work, call a certified technician.
At Air Conditioning Repair of Slidell, we pride ourselves on honest service and expertise. Whether it’s a quick filter replacement, emergency repair, or a seasonal tune-up, our team has got you covered. Contact us today or visit our service page to learn more about our heating and AC repair services. Stay comfortable and safe, and remember – a little care now goes a long way to keeping your system running smoothly.