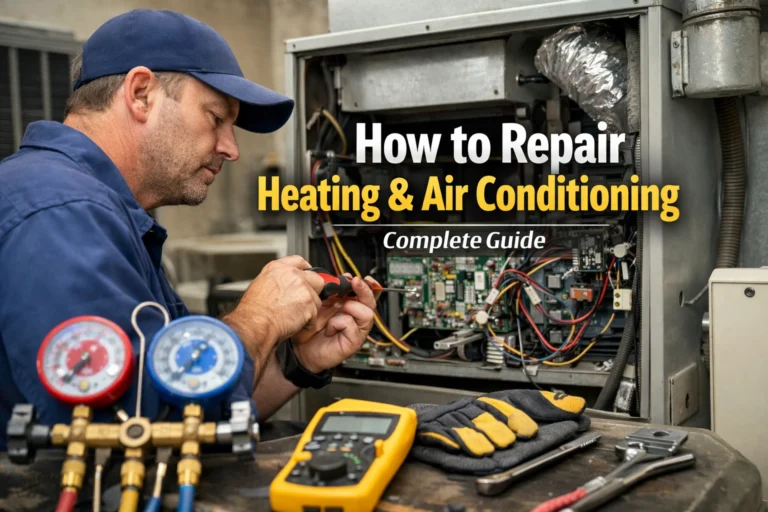
How to Repair Air Conditioning Unit
It was the hottest day of the year. You come home, flip the switch on your air conditioner, and nothing but warm air greets you. You stand there, sweat on your brow, wondering if this repair will cost more than your last grocery bill. I know that feeling. I have been fixing air conditioners for years, and I can promise you this: many problems can be fixed without panic, and without paying too much.
In this article I will walk you through exactly how to repair air conditioning unit step by step. You will learn how to diagnose common issues, when a small fix can save you hundreds, and when you should call a professional. I’m going to speak like I would to a neighbor at the fence. Simple language. Practical advice. No guesswork.
What is the first thing to check when an AC unit stops cooling?
Clear answer first: The very first things to check are power, thermostat settings, and the air filter.
When an AC unit isn’t cooling, most people assume something major is wrong. But in my experience, small issues are often the cause.
Step-by-step:
- Check the thermostat. Make sure it is set to “cool” and the temperature is lower than the room. If the thermostat has batteries, swap them to ensure the display is not dim.
- Check power. Look at the breaker box. If the breaker for the AC is tripped, flip it off and on. Sometimes a small electrical surge will just trip the breaker.
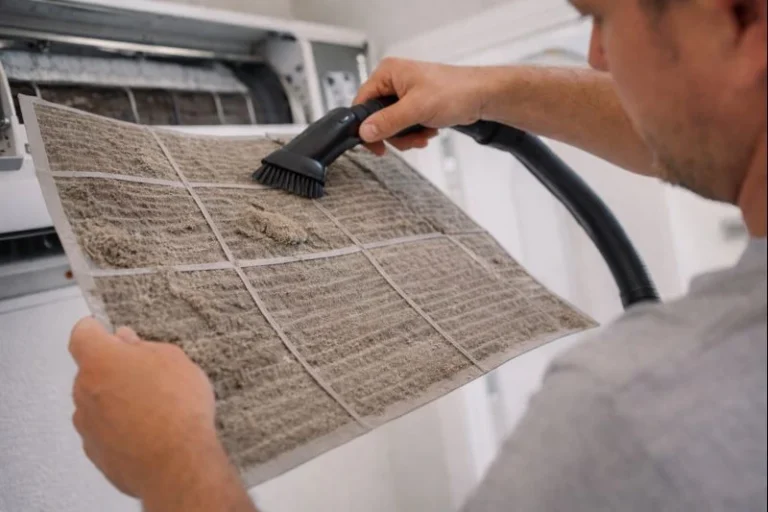
- Inspect the air filter. A filthy filter chokes airflow. A clean filter is one of the easiest fixes and can immediately restore cooling. Filters should be checked monthly and changed when dirty. A blocked filter can cause the evaporator coil to freeze and the unit to stop cooling entirely.
Real example: I once had a call where the AC wasn’t blowing cold air at all. The owner thought the compressor was shot. After ten minutes of checking, we found a completely clogged filter. We replaced it, and the system cooled like new. Always start with the simple things.
Common mistakes: Many people skip checking the thermostat and filter and immediately assume a big fix. That leads to unnecessary expense.
Pro tip: Keep spare filters at home so you can change them without delay when they look dirty.
How do you safely turn off an air conditioning unit before repair?
Clear answer first: Always disconnect power before touching any internal parts.
Before you open a panel or touch wires, turn off the AC at the breaker box. Safety is the foundation of every repair. Cut the power first so you eliminate the risk of shocks or shorts. If you have an outdoor unit, it might also have a service disconnect box nearby. Push it to “off.” Some units even have a switch on the side of the air handler indoors.
Step-by-step:
- Go to the breaker box.
- Find the breaker labeled for your AC.
- Turn it off.
- If your outdoor unit has a disconnect handle, turn that off too.
Once the unit is dead and you confirm no power with a simple voltage tester, you can safely access internal components. Always handle capacitors and wiring with care—they store energy even when off.
Pro tip: If your unit has a bright red external switch box, that’s usually your service disconnect. Use it first before going to the breaker box.
What common parts fail in an AC unit and how do you repair them?
Clear answer first: The most common parts that fail are the air filter, condenser fan motor, capacitor, and refrigerant lines. Repairing these often restores normal function.
Let’s break them down.
Air Filter
Step-by-step:
- Turn off the unit.
- Open the filter slot or return grille.
- Slide out the old filter.
- Replace with a clean filter of the correct size.
Because a clogged filter restricts airflow, the system has to work harder and can freeze up. A yearly pre-season check catches this early.
Condenser Fan Motor
Sometimes the outdoor fan doesn’t spin. This reduces heat removal and stops cooling.
Step-by-step:
- Turn off power.
- Remove the outer panel of the outdoor unit.
- Clear debris from fan blades.
- Check the fan motor capacitor.
- Use a multimeter to test the capacitor.
- Replace the motor or capacitor if needed.
Real example: On a humid afternoon, a homeowner told me their AC made a humming noise outside. We found the fan wasn’t spinning. Cleaning the debris and replacing a weak capacitor fixed it on the same visit.
Common mistake: Trying to move the fan by hand while the unit is powered. That is unsafe.
How do you check and fix a refrigerant problem?
Clear answer first: Proper refrigerant repairs are not DIY for most homeowners. You can test for leaks, but handling refrigerant should be left to certified techs.
Modern units use refrigerants and require recovery, evacuation, and recharge under controlled procedures. The legal and safety rules for refrigerants are strict to protect the environment and your health.
Step-by-step approach:
- After power off, inspect refrigerant lines for frost or oily residue.
- If you suspect a leak, a certified technician can pressurize the system and use a detector to find leaks.
- If a leak is found, that section must be replaced or sealed.
- Once sealed, the entire system is evacuated and recharged with the correct refrigerant and oil.
Real example: A tiny leak at a line fitting made the AC blow warm air. A tech tested and found the leak with dye, fixed the line, and recharged the refrigerant. The system cooled perfectly again.
Common mistakes: Using DIY refrigerant cans that only add gas without recovering or testing leaks. That temporarily fills pressure but does not fix the root issue.
Step-by-step guide to fixing airflow issues
Clear answer first: Poor airflow often comes from blocked filters, dirty coils, or blower issues.
Poor airflow can kill cooling efficiency even when the compressor runs fine. Fix this early.
Step-by-step:
- Check filters first. If they are clogged, replace them.
- Inspect evaporator and condenser coils for debris or dust.
- Clean the coils gently with a soft brush and low-pressure water.
- Check blower motor and fan wheel inside the air handler. If dusty, carefully vacuum the area out.
- If the blower motor hums but does not spin, it might need a new capacitor or motor replacement.
Real example: I had one unit where the blower fan had dust buildup so heavy it barely spun. After carefully cleaning and testing the motor, airflow jumped back and cooling improved instantly.
Pro tip: Never spray high-pressure water on coils. Use gentle rinsing to avoid bending fins.
Why is my air conditioner tripping the breaker?
Clear answer first: Breakers trip when the AC draws too much current due to electrical issues or blocked airflow.
AC systems pull more power when they struggle. A dirty filter or frozen coil makes the blower work harder. That extra load can trip breakers.
Step-by-step:
- Turn off power and reset the breaker.
- Run the AC briefly.
- If it trips again, inspect for blocked airflow or electrical shorts.
- If airflow is normal and breaker still trips, suspect a compressor relay or aged wiring.
Example: One unit kept tripping the breaker in mid-afternoon heat. We found the condenser coil was packed with dirt and grass. Once cleaned, the breaker stayed on.
Common mistake: Resetting repeatedly without fixing the underlying problem.
How to test and replace a capacitor
Clear answer first: Capacitors help start the compressor and fan motors. A failing capacitor often prevents the unit from running.
Capacitors wear out with time and heat cycles.
Step-by-step:
- Cut power.
- Locate the capacitor inside the outdoor unit.
- Discharge it safely (use insulated screwdriver).
- Use a multimeter with capacitance testing.
- Replace if values are off by manufacturer specs.
Real example: A compressor would hum but not start. Testing revealed a weak start capacitor. Swapping it out brought the unit back to life.
Pro tip: Always match the microfarad rating exactly when buying a replacement part.
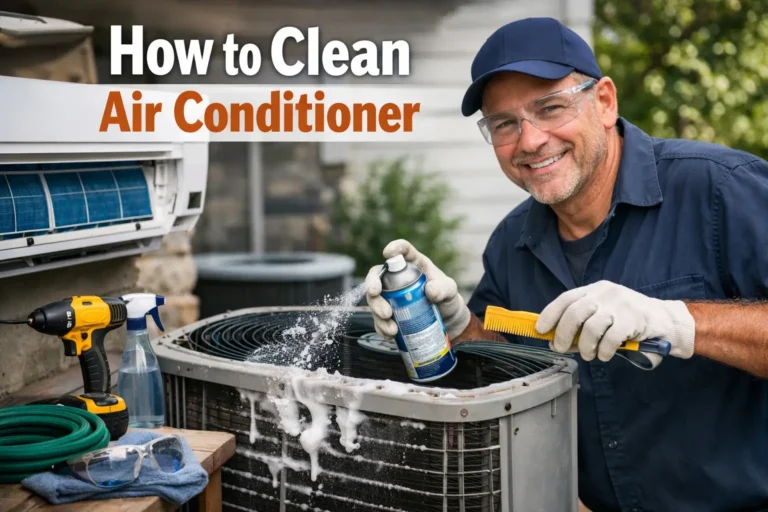
How to clean the outdoor condenser safely
Clear answer first: Dirt and debris on the outdoor condenser reduce efficiency and can lead to costly repairs.
Step-by-step:
- Turn power off.
- Clear leaves, grass, and objects around the unit.
- Use a garden hose to rinse the condenser fins from inside outward.
- Straighten any bent fins with a fin comb.
Important: Never use a pressure washer. High pressure bends fins and chokes airflow.
Regular cleaning saves money in the long run and prevents stress on the compressor and fan motor.
What tools do you need to repair an AC unit?
Clear answer first: You need basics like a multimeter, screwdrivers, fin comb, soft brush, garden hose, and safety gear (gloves and goggles).
Simplest tools often solve basic issues.
A multimeter helps test capacitors and continuity. A soft brush and gentle water remove dust and debris. A fin comb keeps coils straight.
More advanced tools like vacuum pumps and refrigerant manifold gauges are for certified technicians.
When should you call a professional to repair an air conditioning unit?
Clear answer first: Call a professional when repairs involve refrigerant handling, electrical wiring beyond basic disconnects, or complex component replacement.
You can handle filters, cleaning, airflow checks, and basic capacitor tests. But tools like refrigerant recovery machines and high-pressure gauges should only be used by trained techs.
Certifications exist for a reason. Proper refrigerant service prevents environmental damage and meets regulations.
Real example: A board replacement inside the outdoor unit can involve multiple high-voltage connections. One wrong step and you risk damage or shock. That’s when calling a pro protects you and your system.
How long does repairing an AC unit usually take?
Clear Answer First: Small fixes like cleaning, filter change, or capacitor swap take about 30 minutes to a couple of hours. Major component repairs can take several hours to a full day.
Step-by-step estimate:
- Filter change: under 15 minutes.
- Cleaning coils: 30–60 minutes.
- Fan motor or capacitor replacement: 1–3 hours.
- Refrigerant leak repair: 2–6 hours depending on location and access.
Pro tip: Book repairs early in the season. Shops are less busy and you can get quicker service.
Cost factors when repairing an air conditioning unit
Clear answer first: costs vary widely based on parts, labor, accessibility, and the specific issue.
Minor jobs like filter replacement and cleaning are inexpensive. Dirty coils cleaned at home cost almost nothing. Replacing a fan motor, capacitor, or fixing wiring carries parts and labor costs.
Major repairs involving refrigerant lines or compressor replacements are pricier because they require specialized tools and time.
How to prevent future AC breakdowns
Clear answer first: regular maintenance prevents most repairs and keeps your unit efficient.
Steps to prevent breakdown
- Change filters every 1–3 months.
- Clear debris around outdoor unit.
- Check thermostat calibration.
- Schedule yearly professional maintenance.
Maintenance is like oiling the hinges on a door—it keeps parts from binding and failing.
Frequently Asked Questions (FAQ)
Q: Why does my AC blow warm air?
A: Often due to dirty filters, blocked airflow, low refrigerant, or condenser issues.
Q: What kills most AC systems?
A: Running with a clogged filter and dirty coil stresses the compressor and fan.
Q: Can I open my outdoor unit myself?
A: Only after cutting power and only for basic cleaning. Internal repairs are best left to pros.
Q: Why is refrigerant service not DIY?
A: Handling refrigerant needs certified equipment and knowledge for safe recovery and recharge.
Q: How often should filters be changed?
A: Check every month; replace when dusty or quarterly.
Q: Will cleaning the coil fix cooling problems?
A: Often, yes. Dirt reduces heat transfer and efficiency.
Q: My breaker keeps tripping. What now?
A: Check airflow first. If it still trips, suspect electrical faults needing professional check.
Q: Is repair expensive?
A: Simple fixes are cheap. Major parts can be costly. Repairs beat replacement most of the time.
Q: Why does AC smell musty?
A: Often due to drain clogs or mold in evaporator area.
Q: How long should an AC last with repairs?
A: With good care, many units run well for 10–15 years.
Conclusion: how to repair air conditioning unit
You now have a clear, practical playbook on how to repair air conditioning unit. You learned what to check first, how to clean and fix common parts, and when to bring in a pro. You saw step-by-step guidance and real-world examples.
Take it slow. Start with power, thermostat, and filter checks. Then move to cleaning and basic motor components. If you hit electrical or refrigerant areas, call a trained technician.
Air conditioners are not magic boxes. They run on air, pressure, coils, and some simple physics. Treat them with respect. Clean them regularly. And when they fail, use sensible steps to diagnose and fix.
You are now empowered to fix small AC problems and avoid costly repairs later. I have been there with many systems, and this approach has saved hours, money, and stress for many homeowners like you.